Download Open ModManager from the github below:
Releases · iquercorb/OpenModMan
The File you should look for will be named
OpenModMan_#-#-#-x64_setup.exe Where the # will be the numbers to indicate the version number.
Once downloaded run the .exe and install it to the location of your choice then.
-
Open Modmanager from the Windows Start Menu
-
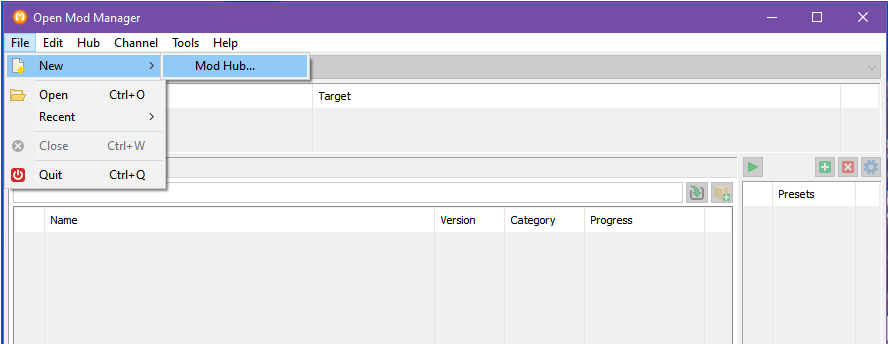
Click
Filein the menu bar and select New and then Mod Hub from the menu.
-
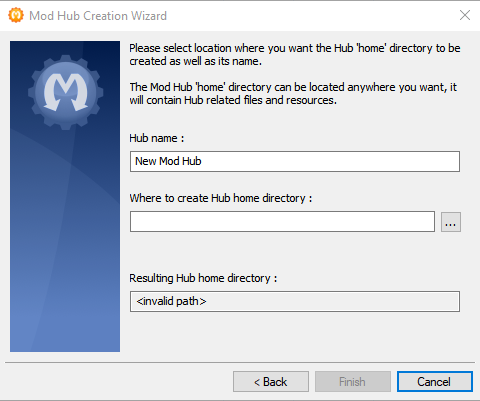
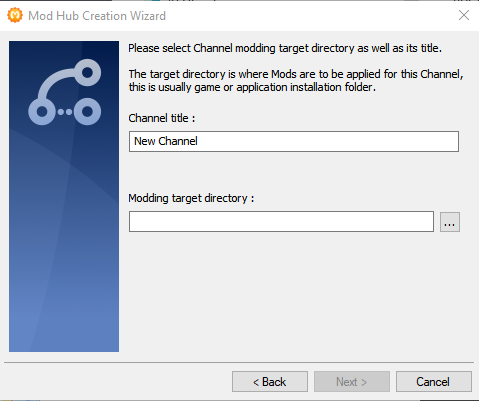
The Window below will appear.

-
Click
Next>to continue
-
Give your Modding Hub a unique title of your choice in the Hub Name box,
(I highly recommend giving the Modding Hub the same name as the Game the mods are for as you can have multiple Modding Hubs and multiple Channels within each Hub)
then click the box with three dots to the right of the Where to create Hub home directory: box and choose an empty folder on your PC that Modmanager will use to download the mod-Archive Files to and store them. I Would recommend making a new folder in your PC’s Downloads Folder similar to the one I have shown below but it is of course up to you.
DO NOT choose the Root of the C: Drive, your User Folder, your Program Files or Program Files(x86) Folders.
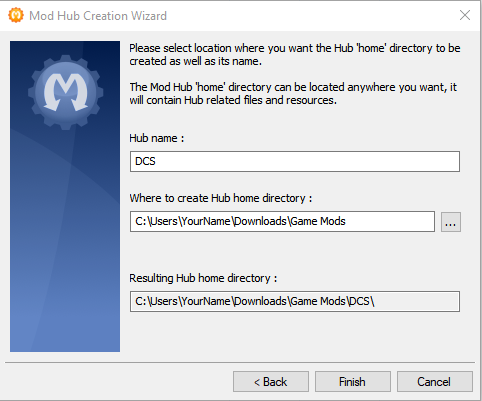
Once it looks something like the image below, but with your info, click Finish.
-
The Mod Hub Creation Wizard window will disappear and this pop up should appear and ask if you wish to create a new modding Channel

ClickYes, if this popup does not appear then in the Modmanager Menu Bar at the top of the Window, ClickHub, thenAdd Channel. -
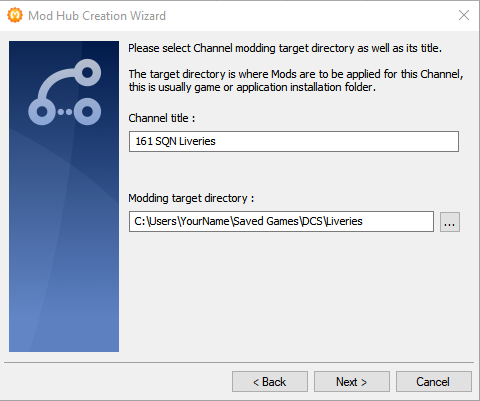
The window shown below will open,
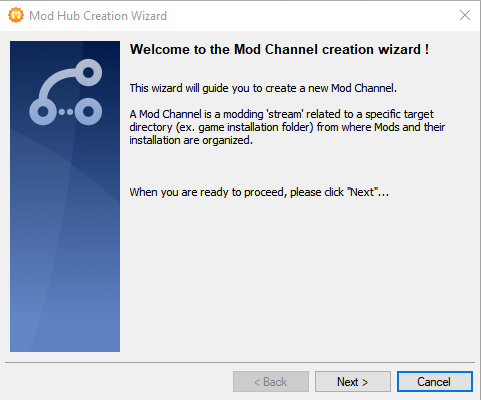
ClickNext>to open this window
Give your Channel a name (Channel is the name that is used to differentiate between the different mods sets within each Modding hub), This can be anything you like, but should be something that lets you know what Mods you have in this group, I would Suggest 161 SQN Liveries
The Modding target directory box should point to the Liveries Folder in your DCS Saved Games folder.
To set this click on the button with three dots to the right of it and navigate to yourSaved Games Folderand choose theLiveriesFolder that is located inside the DCS Folder, if you have never added a skin to DCS in the saved games folder, just Create a folder called Liveries in your DCS Saved Games folder and then point this box at that location.
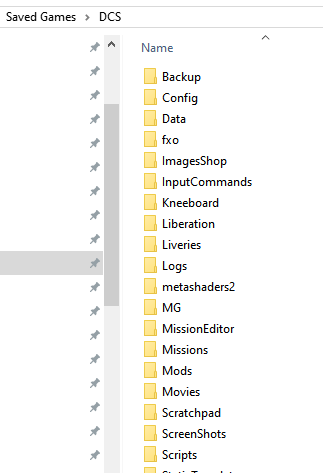
Do not worry if you do not have all the same folders in yourSaved Games/DCS Folder -
Once you have completed that you should have something like this
-
Click
Next>and as you see below you will be presented with another window with the two check boxes,
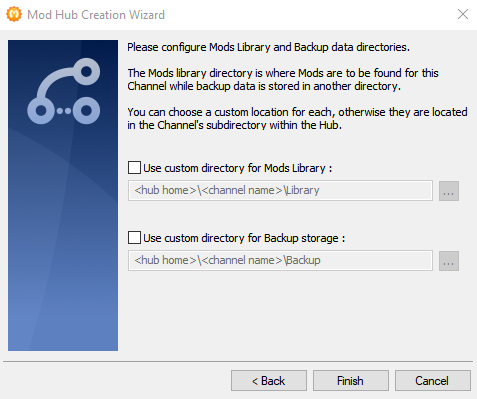
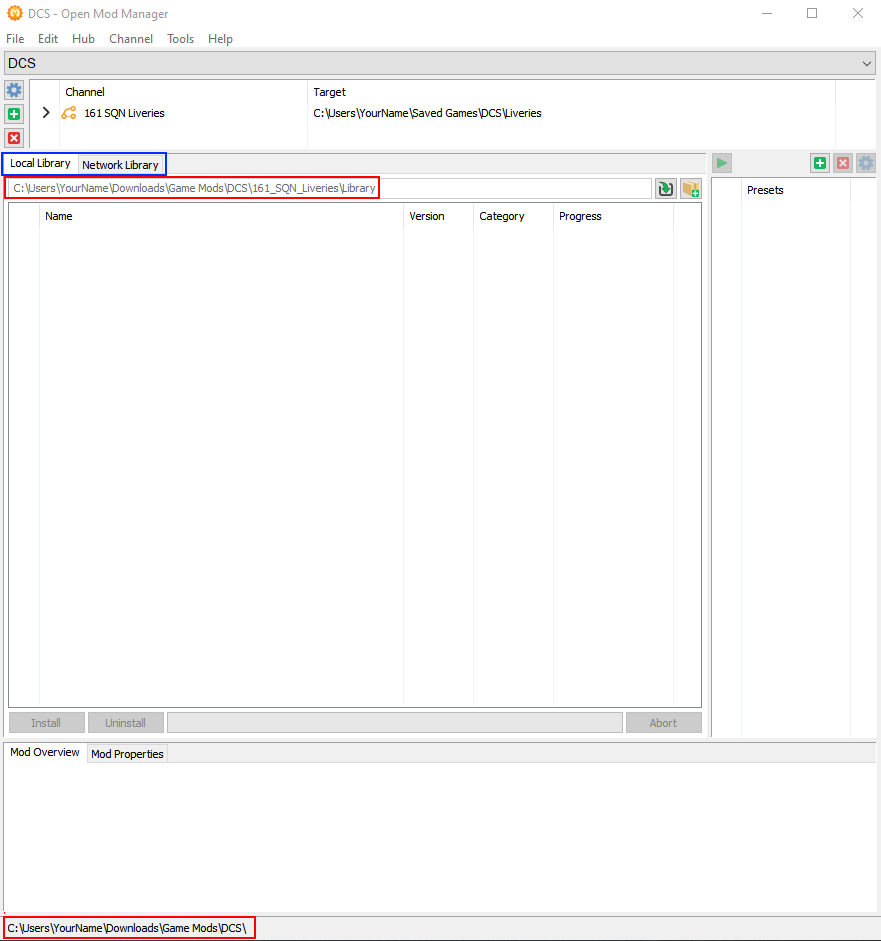
leave them unticked and clickFinishand you should return to the main window with your folder structure in the boxes shown below (Marked Red).
-
Now click on the
Network Librarytab half way down the screen (Marked Blue),to change the center section of your Modmanager window to look like this.
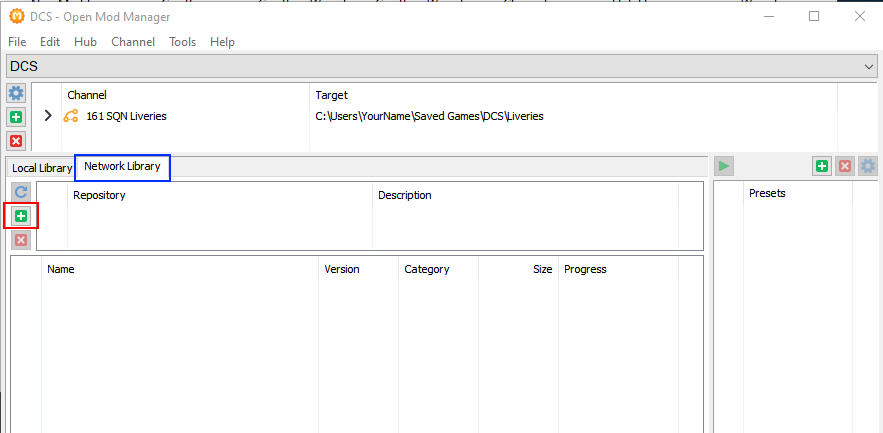
Then click on the small green plus on the left (Marked Red), which will open the Repository Configuration Wizard,
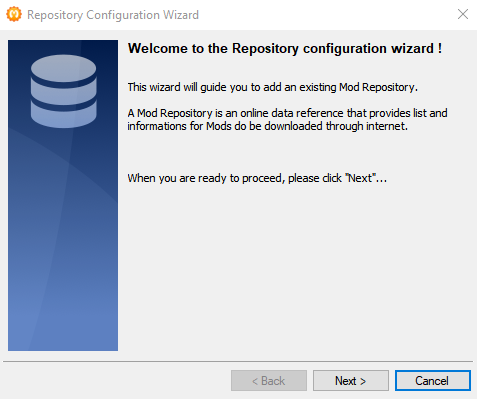
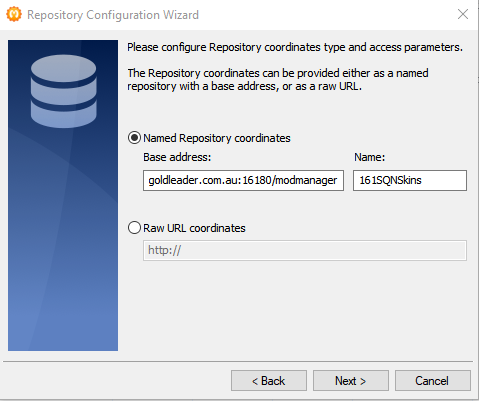
click Next> and a window similar to the one below should pop up.
-
Copy and paste the following into the Base address: box so it matches the image (These are case sensitive) and make sure there are no spaces at the end of either field once you have pasted the info.
http://dcs.goldleader.com.au:16180/modmanager
Copy and paste the following into the Name: box
161SQNSkins
and then click Next> Modmanager will do a test query of the Skin repository and you should see this window with the message Repository appear valid like the image below
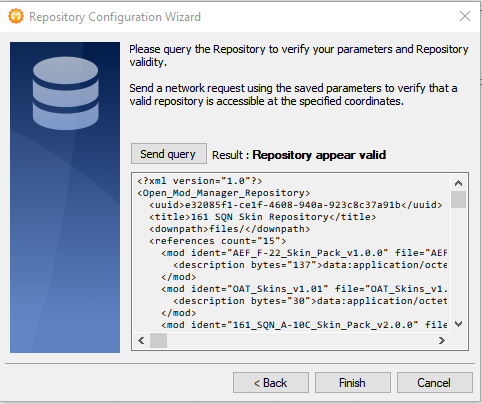
if you do, click Finish to return to the main Modmanager window, if you see any other message click <Back and double check the boxes are filled in correctly, checking to make sure they are the correct case, if everything looks correct but Modmanager is still showing an error message send me a DM me on the 161 SQN Discord.
-
Now click on the small circular arrow on the left (Marked Red) and the Skin Repo should be polled and the list of available skin packs should populate and give you a window something like this.
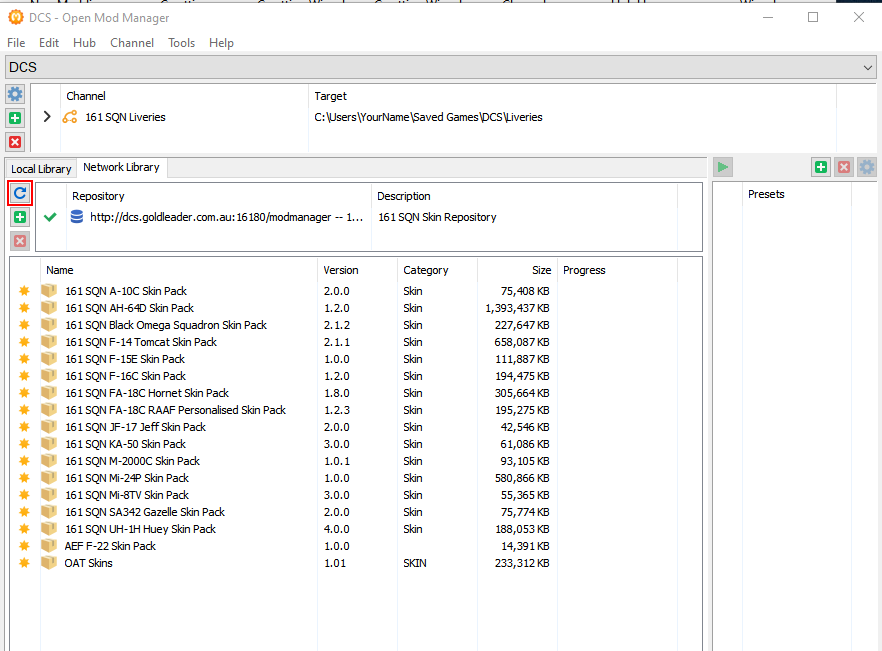
Icons to the Left indicate the status of each file that is available in the repository (Skin Pack)
A Green Tick = Repo and your machine have the same version
An Orange Up Arrow = A Newer version exists on the Repo Server
Yellow Star = This is a new Skin Pack you have not downloaded yet. -
Now you can choose which Skin packs you wish to download, there are a couple of different ways to do this.
- Double click each individual skin pack to download them one at a time.
- Right click on each individual skin pack and select Download (Right click menu shown below)
- Select Individual Skin packs and click the Download button (Marked Red) at the bottom of the window
- Use Ctrl Click and Shift Click to add multiple lines and once you have selected the skin pack you wish to add to your config folder you can click the Download button and your downloads will begin.
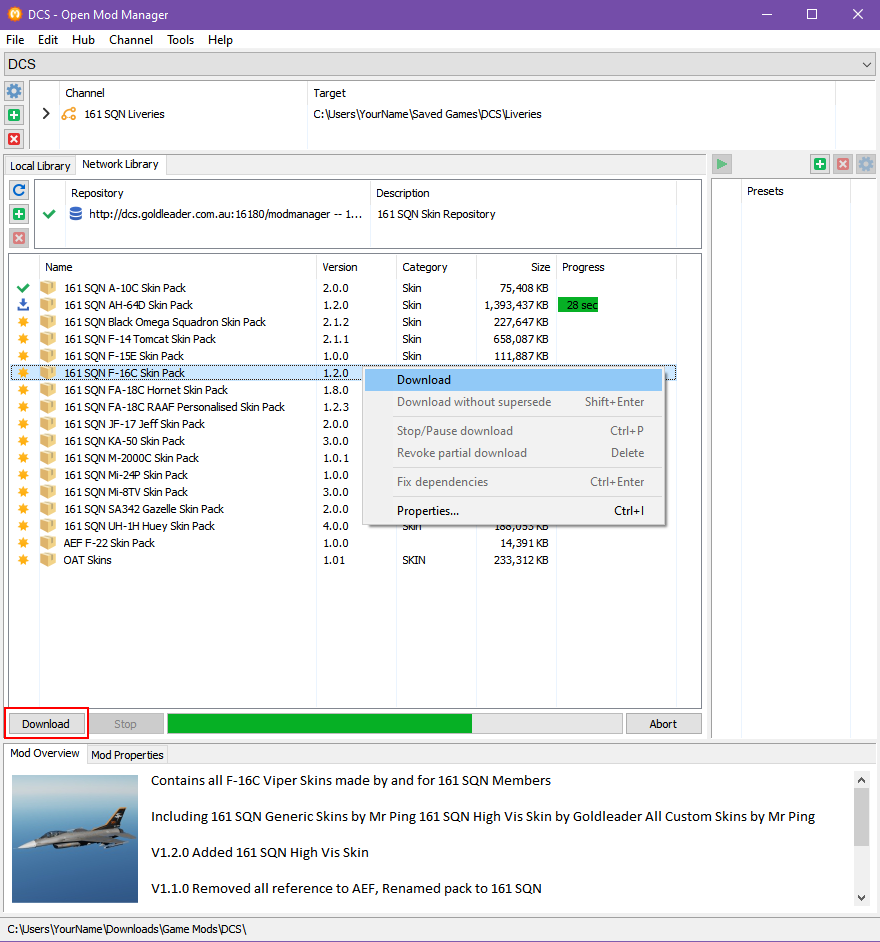
Once you have downloaded a skin pack a green check mark will appear next to it to tell you that the version you have downloaded matches the version on the server. You can also see the description for each skin pack at the bottom of the screen as you can see above.
-
Once all of your downloads have completed click on the
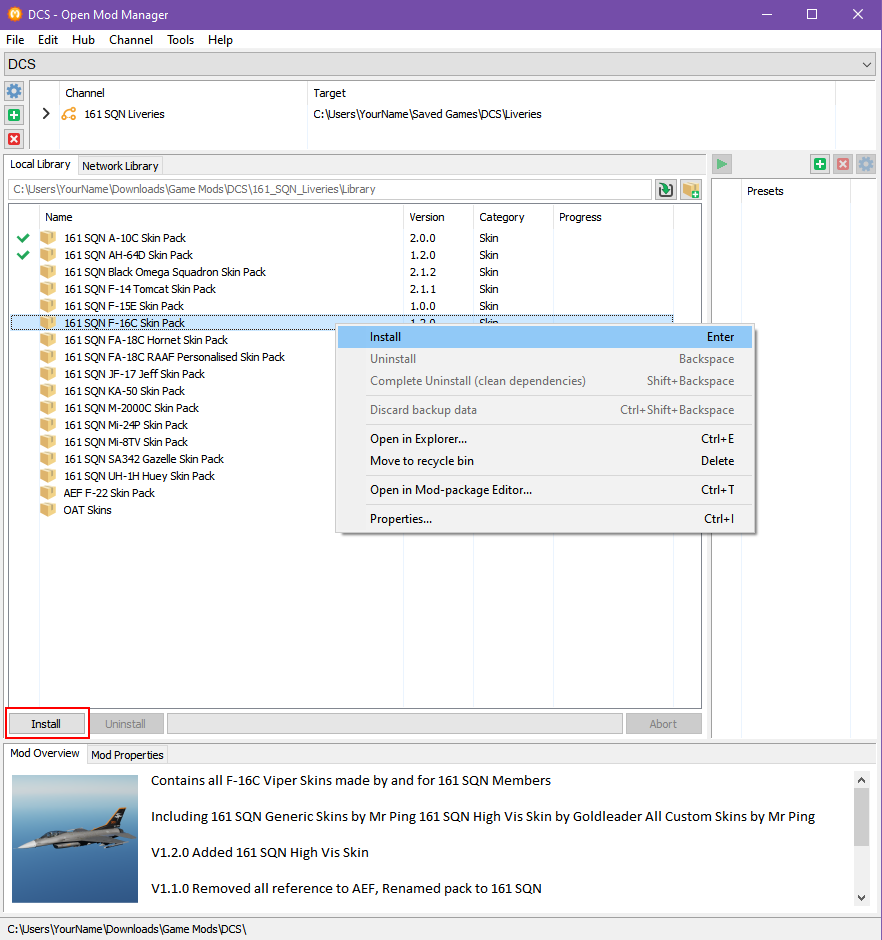
Local Librarytab.
TheNetwork Librarytab shows you the download status of the Skin packs and theLocal LibraryTab shows the status of the Skin Packs that have already been downloaded and are stored locally on your computer.
-
As the above image shows, you can now select all of the skins you want to install, and either
Right Clickon them and selectInstallfrom the pop up menu (As Shown above), or Click theInstall buttonin the bottom left (Marked Red), ModManager will then extract the Mod-Archives to your Liveries folder and the skins will show up in game in all their glory. -
The Final Step is to configure Modmanager to load this Mod Hub when it opens, to do so in the Modmanager Menu bar click Edit then Manager Options
This window should open.
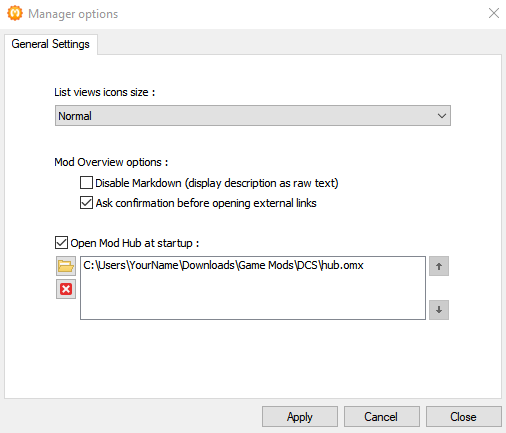
Check the BoxOpen Mod Hub at Startup:
Then Click the Folder Icon and navigate to the location you set in the Hub Manager when creating your Mod Hub in step 5.
You should find a file called hub.omx
Once you have something similar to the image above, click Apply then Close and next time Mod Manager loads it will load your Skin Repository.